Converting Text to Speech with Azure AI Speech and .NET

What is Speech Synthesis?

Speech Synthesis is part of Azure’s Speech Services, a set of Microsoft AI services designed to provide advanced speech and natural language capabilities in applications. It is a technology that converts text into artificial human speech, allowing computers to “speak” by turning written words into audible and natural-sounding voices. Speech synthesis is commonly used in virtual assistant applications, voice navigation systems, screen readers for people with visual impairments, and more.

How Speech Synthesis Works

Speech synthesis technology uses deep learning models to generate a voice that sounds natural. These models are trained on large volumes of speech and text data, enabling the technology to learn the nuances of human speech pronunciation, intonation, and rhythm. Azure offers various customizable voices, allowing developers to choose the voice that best suits the needs of their application. In our example project, we will use Brenda’s voice.

Common Applications

There are various use cases for speech synthesis. Some of them include:

  • Virtual Assistants: Assistants like Cortana, Siri, and Alexa use speech synthesis to interact with users in a natural and intuitive way.

  • Voice Navigation Systems: Navigation apps, such as Google Maps and Waze, use speech synthesis to provide real-time directions.

  • Screen Readers: Tools like NVDA help people with visual impairments access digital content by converting text to speech.

  • Customer Service: Customer service bots can use speech synthesis to offer automated and efficient support to clients.

Benefits of Speech Synthesis

Just like the use cases, the benefits are diverse and depend on the type of application:

  • Accessibility: Improves accessibility for people with visual impairments or reading difficulties.

  • Multilingual Support: Supports multiple languages, enabling the creation of global applications.

  • Customization: Voices can be customized to reflect the brand or desired style.

  • Engagement: Provides a more natural and engaging interaction with users.

Creating the Speech Synthesis Service in Azure

To use the speech synthesis service, you need to have an active Azure subscription. Then, access the Azure portal and click on Create a new resource. Search for “Speech”.
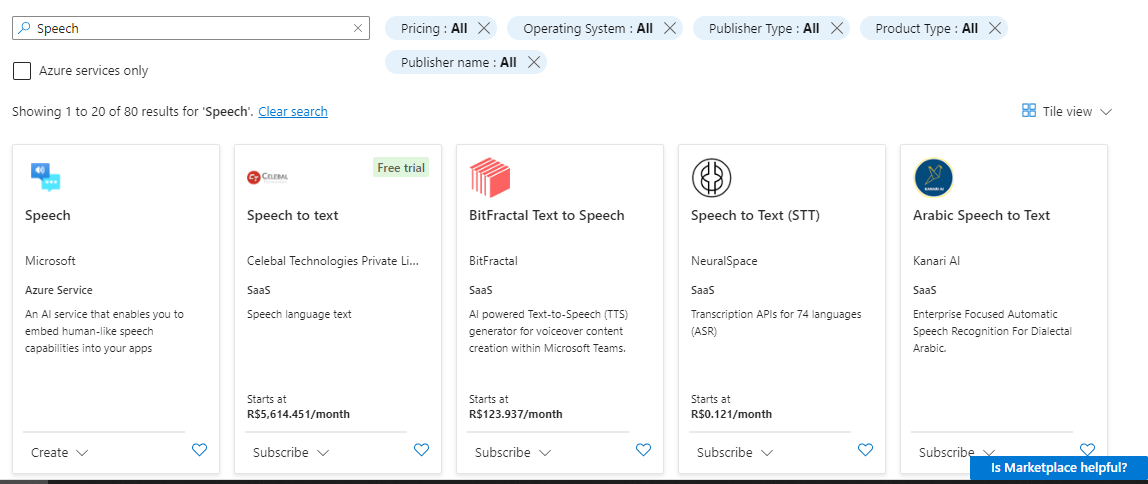
Click on the “Speech” or “Fala” item, and a screen similar to the one below will appear. Click on “Create”.
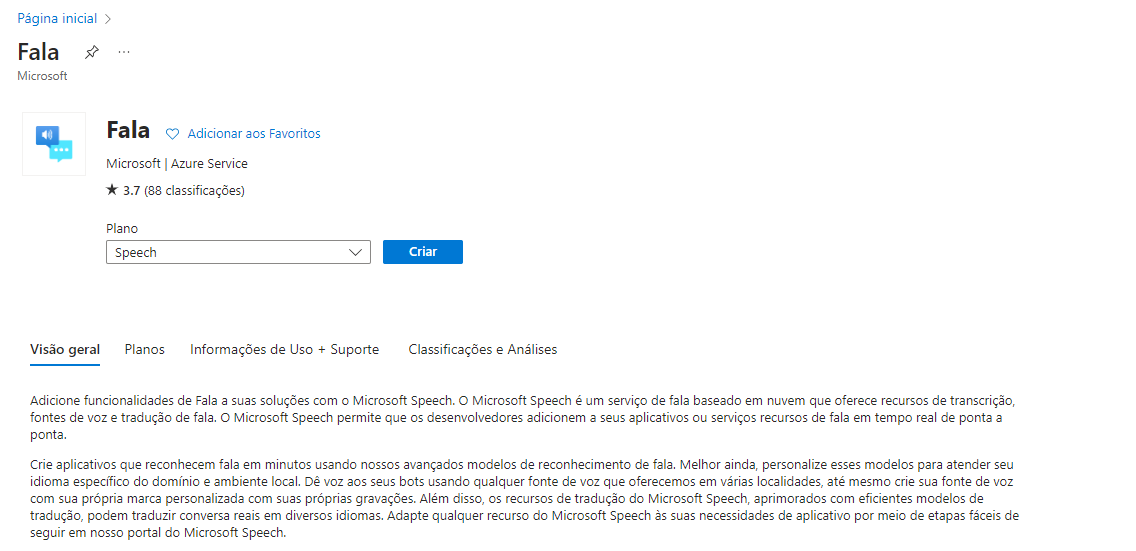
Fill in the following information:

  • Subscription: Select your Azure subscription.
  • Resource Group: Choose an existing resource group or create a new one.
  • Resource Group Region (if you’re creating a new Resource Group): Select the region for your resource group.
  • Region: Choose the region where your Speech service will be hosted.
  • Name: Provide a name for your Speech service.
  • Pricing Tier: Select the pricing tier that fits your needs (for example, “Standard” or another option based on your usage and budget).

In the image below, I show the settings I used.
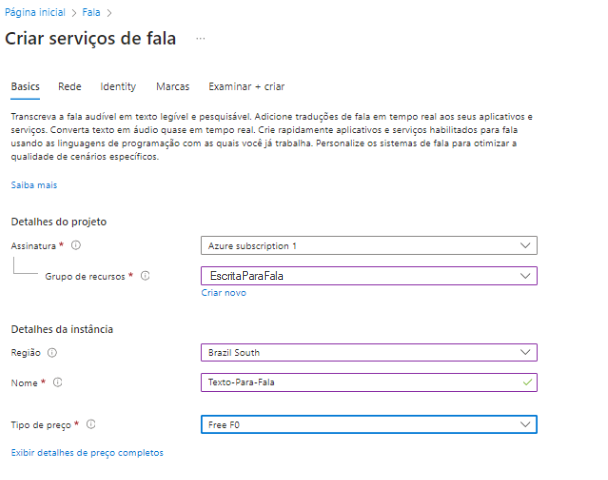
After filling in all the information, click on Review + Create and then click Create.


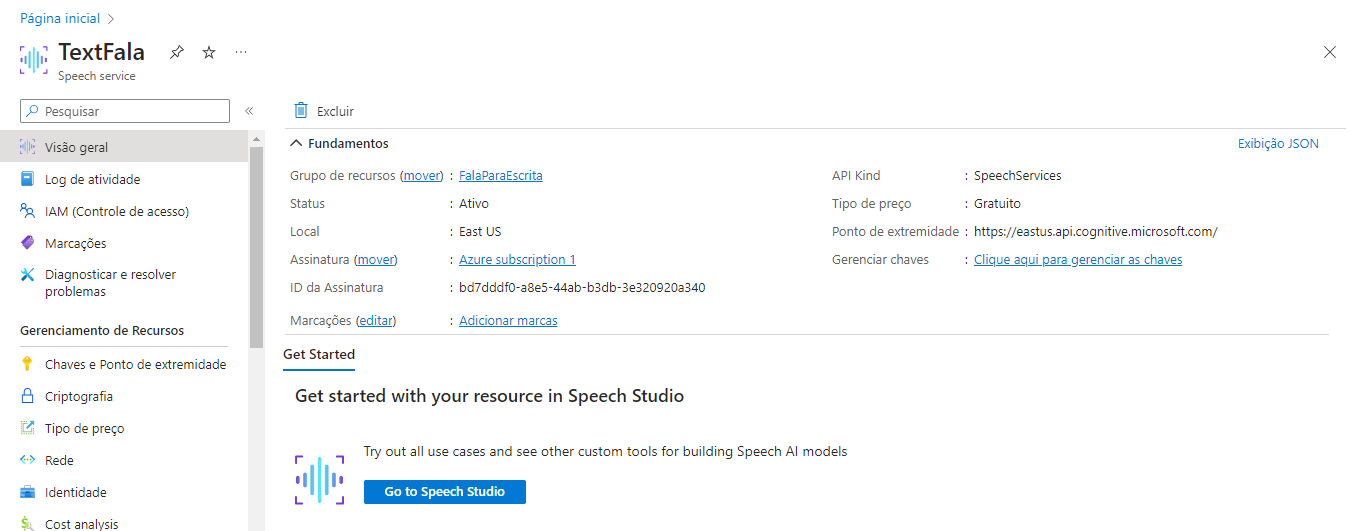
Next, the screen for your application will appear, where you will find the two access keys and the location and region. These two pieces of information will be important when we need to configure our API.
Creating the Demo Project

To demonstrate the use of Azure AI Speech, we will create an ASP.NET Core API that will receive a text and return an audio file.

With an ASP.NET Core Web API project created, install the following package:

				
					dotnet add package Microsoft.CognitiveServices.Speech


Next, create a controller named TextToSpeechController, which will be responsible for receiving the text to be converted and returning the audio file with the result of the speech synthesis. The initial structure of this controller can be seen below:

				
					using Microsoft.AspNetCore.Mvc;
namespace TextToTalk.Controllers
{
    [ApiController]
    [Route("[controller]")]
    public class TextToSpeechController : ControllerBase
    {

       [HttpPost]
       public async Task<IActionResult> TextToSpeech(string text)
       {
            try
            {
                //main code here
            }
            catch (Exception ex)
            {
              	return BadRequest(ex.Message);
            }
        }
   }
}


Now, inside our try block, let’s add the necessary data and configurations to connect to the conversion API. Here’s how you can modify the code to include these configurations:

				
					string speechKey = "Yout key 1 or key 2";
string speechRegion = "brazilsouth";
var speechConfig = SpeechConfig.FromSubscription(speechKey, speechRegion);
speechConfig.SpeechSynthesisVoiceName = "pt-BR-BrendaNeural";


In the code above, we created the variable speechKey to store our key 1 or key 2 and speechRegion to store the region of the Azure Speech Synthesis service, both of which were obtained earlier from the portal. Then, we use the information provided in the speechKey and speechRegion variables to initiate a configuration in the speechConfig variable. Once this is done, we can choose the language and type of voice we want. For this tutorial, we used “pt-BR-BrendaNeural”, a Brazilian Portuguese voice that offers natural speech quality.

If you want to use other voices, there are currently 16 options: Francisca, Antonio, Brenda, Donato, Elza, Fabo, Giovanna, Humberto, Julio, Leika, Laticia, Manuela, Nicolau, Valerio, Yara, Thalita. To use them, simply enter “pt-BR-VoiceNameNeural”. For example: “pt-BR-ManuelaNeural”.

Right after the previous code block, a SpeechSynthesizer is created with the specified configuration (speechConfig), which will be stored in the synthesizer variable. The using statement ensures that all unmanaged resources are properly released after the synthesizer is used.

				
					using (var synthesizer = new SpeechSynthesizer(speechConfig))
{
    var result = await synthesizer.SpeakTextAsync(text);

    if (result.Reason == ResultReason.SynthesizingAudioCompleted)
    {
        var audioByte = result.AudioData;
        return File(audioByte, "audio/wav" , "output.wav");
    }
    else
    {
        throw new Exception($"Error while generating áudio: {result.Reason}");
    }
}


The SpeakTextAsync method receives the text provided by the user, converts it to audio asynchronously, and stores the result in the result variable, which will hold the operation’s outcome, including the generated audio and information about the operation’s status. Next, we check if the speech synthesis was completed successfully (result.Reason == ResultReason.SynthesizingAudioCompleted). If it was, we extract the audio data (result.AudioData) and return it as a WAV file with the content type “audio/wav” and the name “output.wav”. Otherwise, we throw an exception with an error message describing the reason for the failure.

At this point, we can run our API and make an HTTP POST request to the TextToSpeech endpoint. The result should be an audio file available for download.

Conclusion

In this tutorial, we demonstrated how to implement text-to-speech conversion using Azure Speech Services in an ASP.NET Core application. With this knowledge, you can expand this implementation to include additional features, such as support for different languages and voices, customization of the audio output format, and improvements to the user interface for a richer experience.
To deepen your understanding and explore more features, we recommend checking the official Azure AI Speech Services documentation. There, you will find advanced examples, best practices, and customization possibilities to make your application even more robust and tailored to users’ needs.

By following these guidelines, you will be well-equipped to develop innovative solutions that leverage the power of text-to-speech conversion, enhancing accessibility and user experience in your applications.