


ChatGPT is an artificial intelligence (AI) application based on GPT (Generative Pre-trained Transformers), developed by OpenAI. It is a deep learning language model capable of understanding and generating text in response to user input. Essentially, ChatGPT is an advanced chatbot that can engage in natural language conversations with users.
What Types of Projects Can It Be Used For?
There are many ways to integrate ChatGPT to enhance your application’s functionality. Here are just a few examples:
Text Correction Tools: Users can input text and receive grammar, spelling, and coherence corrections, along with contextual improvement suggestions. ChatGPT can analyze sentence structure, tone, and clarity, providing valuable insights to enhance the message’s impact.
Dynamic and Detailed Descriptions: Generate descriptions based on user-provided information during registration. These descriptions can also be dynamically updated whenever user data changes, ensuring relevant and up-to-date content.
Accurate and Contextualized Translations: Ideal for language learning websites, ChatGPT provides translations that go beyond literal meanings, considering the context and intent behind the words.
How Does the Integration Work?
Integration with ChatGPT is done through its RESTful API. You send requests containing interactions (such as questions) and receive responses. These requests must be authorized with an API key, which can be obtained from OpenAI’s website.
To interact with ChatGPT in our applications, we can use any HTTP client, but there are also libraries that encapsulate this logic, making integration easier.
In this tutorial, we’ll integrate ChatGPT into a .NET application. First, we’ll create an OpenAI account and generate an API key for the integration.
Creating an OpenAI Account
Go to the OpenAI website and click “Log in” in the top-right corner to access the login page.
Fill out the registration form with your email, username, and password. Alternatively, sign up using your Google or GitHub account.
Click “Sign Up” to create your account. You may receive a confirmation email to activate your account.
After activation, log in to OpenAI and navigate to the API section.
Generating an API Key for ChatGPT
After logging in, go to your account’s dashboard and find the “API Keys” section in the left menu.
If this is your first time generating an API key, you may need to agree to OpenAI’s terms of service.
Click “Create API Key”, name it for easy identification, and save it securely.
Once generated, the key will appear in a dialog box. Copy and store it safely, as you won’t be able to view it again after closing the window.
Creating the .NET Project
For this demo, we’ll build an ASP.NET API. Below is the base structure of our application, including a ChatGptController with a POST action called UseChatGPT, which receives a query parameter representing the message to be sent to ChatGPT.
					using Microsoft.AspNetCore.Mvc;
using Newtonsoft.Json;
using System.Text;

namespace ApiChatGPT.Controllers
{
    [Route("api/[controller]")]
    [ApiController]
    public class ChatGptController : ControllerBase
    {
        [HttpPost]
        public async Task<ActionResult> UseChatGPT(string query)
        {
            try
            {
                // Our code here
            }
            catch (Exception ex)
            {
                return StatusCode(500, $"Error using ChatGPT: {ex.Message}");
            }
        }
    }
}
Now, let’s implement the logic for the UseChatGPT action. The first step is to store the API key generated on the OpenAI website in a string so that we can use it in our requests. In real-world projects, it is recommended to store the key in a secure location.
string openaiApiKey = "your-api-key-here";
Next, we will start building the request body using a dynamic object where we will add the necessary fields.
					var requestBody = new
{
    model = "gpt-3.5-turbo", // Model to be used
    messages = new[]
    {
        new { role = "user", content = query }
    },
    temperature = 0.7
};
The model field defines which model to use (e.g.,
gpt-3.5-turbo).The messages field contains an array of objects with
roleandcontent. The role"user"represents a user message, and the content is the message received via the API’s query parameter.The temperature field controls randomness (0 to 1). Higher values produce more varied responses, while lower values generate more deterministic responses.
Now, serialize the request object using Newtonsoft.Json:
var requestBodyJson = Newtonsoft.Json.JsonConvert.SerializeObject(requestBody);
Now we have to create an HttpClient instance, so we can make a request to OpenAPI API.
The following code performs three main tasks: adding the API key to the request header, sending a POST request, and handling the response.
					using (var httpClient = new HttpClient())
{
    httpClient.DefaultRequestHeaders.Add("Authorization", $"Bearer {openaiApiKey}");

    var response = await httpClient.PostAsync("https://api.openai.com/v1/chat/completions",
        new StringContent(requestBodyJson, Encoding.UTF8, "application/json"));

    if (response.IsSuccessStatusCode)
    {
        string responseBody = await response.Content.ReadAsStringAsync();
        var responseObject = JsonConvert.DeserializeObject<dynamic>(responseBody);
        string content = responseObject.choices[0].message.content;
        return Ok(content);
    }
    else
    {
        return BadRequest(response.StatusCode);
    }
}
At this point we can execute the project and text our implementation, by sending some requests in Swagger UI.
Using the OpenAIApi package
Did you find the previous code complex? There is an alternative to connect with ChatGPT that abstracts all the HTTP request logic for us. To do this, we will install the OpenAIApi package.
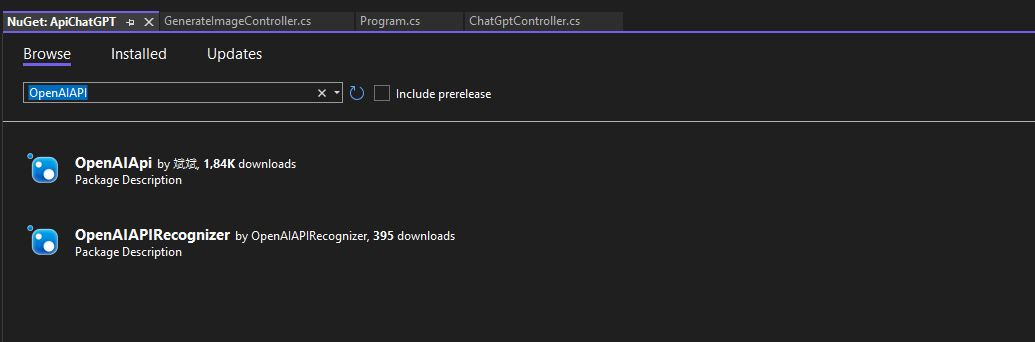
Now, see below how our UseChatGPT action code looks:
					[HttpPost]
public async Task<ActionResult> UseChatGPT(string query)
{
    try
    {
        var api = new OpenAIAPI("sua chave aqui ");
	    var result = await api.Chat.CreateChatCompletionAsync(query);
	    return Ok(result);
    }
    catch (Exception ex)
    {
        return StatusCode(500, $"Erro ao usar o ChatGPT: {ex.Message}");
    }
}
The above code shows that it is possible to create an instance of the OpenAIAPI class by passing an API key as a parameter. After that, we send our query to the OpenAI API, and the response is stored in the result variable, which is then returned by our API.
As we have seen here, creating an OpenAI account and accessing ChatGPT is quite simple and practical. Without needing in-depth knowledge of topics like machine learning and artificial intelligence, we can quickly add modern and innovative capabilities to our applications.